1. Log in to the BitexVendor App:
– Open the BitexVendor app on your smartphone or tablet.
– Enter your registered email or phone number and password to access your account.

2. Access the Menu Management:
– Once you’re on the app’s dashboard, find and click on the “Add Item” tab. This will take you to the Item editing section.

3. Add a New Item:
– To add a new item to your menu, click on the “Add Item” button.
– Enter the name of the dish or product in the designated field.
– Provide a brief description of the item to entice customers (mandatory).
– Set the price for the item, ensuring it reflects its value and cost.

4. Add Item Image (Mandatory):
– You can make your menu more visually appealing by adding images of your dishes or products.
– Click on the “Add Image” option and select a high-quality photo from your device’s gallery.
– Crop or adjust the image as needed and save it.
5. Categorize Your Menu (Optional):
– If your menu includes various types of dishes or products, consider organizing them into categories (e.g., starters, main courses, desserts).
– Click on the “Add Category” option and name the category accordingly.
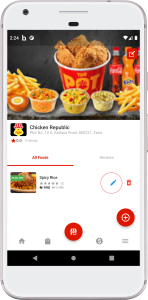
6. Edit Existing Items:
– To edit an existing item, locate it in the Item list and click on it.
– You can modify the name, description, price, or image of the item.
– Save your changes once you’re done.
7. Remove Items (Optional):
– If you wish to remove an item from your menu, find it in the menu list and click on the “Remove” or “Delete” option.
– Confirm the removal to complete the process.

8. Save Changes:
– After adding or editing items on your menu, always remember to save your changes by clicking on the “Save” or “Update” button.

Last Update: July 21, 2023